Automating damage event detection in LoL
intro
It’s been a while since I’ve last played League of Legends. In my return, I noticed that I struggle to see the damage indicator shown when getting hit in-game. It looks like this:
Well, looking at it like this it’s actually quite visible right? Now try again while playing super locked into the game and possibly looking through the shop for your next item. At least for myself and how easily distracted I get and occupied with something else It became a problem.
I took this as a chance to experiment with Computer Vision and learn about color theory. The idea is simple: Read pixels from a corner of the game window and play a sound when we detect a red damage vignette.
Note: Prior to using python-MSS I actually started out by capturing obs-virtual cam through cv2.VideoCapture. While it was handy being able to capture a specific window this way it was having trouble keeping frame rate at a reasonable number.
Let’s start by capturing frames. For this, we’ll be using python-MSS, an “ultra fast cross-platform multiple screenshots module in pure python using ctypes”. Their handy examples section provides us with the snippets we need to capture pixel data from the screen. In addition, we will be using OpenCV-Python, to process the frames.
import cv2
import numpy as np
from mss.darwin import MSS as mss

with mss.mss() as sct:
# Part of the screen to capture
	monitor = {"top": 40, "left": 0, "width": 800, "height": 640}
    # Screen Capturing
    while True:
	    last_time = time.time()
		# capture an image of the screen and store it in a numpy array.
		img = np.array(sct.grab(monitor))
		cv2.imshow("OpenCV/Numpy normal", img)

		if cv2.waitKey(25) & 0xFF == ord("q"):
			cv2.destroyAllWindows()
			break
python-mss provides us with a grab function that we can use to “grab” pixel data from a region of the screen. We can call this X times per second to get a real-time stream of the game. In this instance, we are capturing the default monitor of the system 40 pixels down from the top of the monitor and at a resolution of 800 by 640 pixels. These are arbitrary numbers chosen for my setup but can be changed to use the game window’s position or read directly from the game’s framebuffer. Now that we have the ability to capture our screen live all we really need to do is detect whether or not we surpass a certain threshold of total pixels on screen being red.
def isolate_red (frame, red_threshold):
    frame = cv2.cvtColor(frame, cv2.COLOR_BGR2HSV)
    # red color boundary

    # Define red hue ranges
    lower_red1 = np.array([0, 100, 100])
    upper_red1 = np.array([10, 255, 255])
    lower_red2 = np.array([160, 100, 100])
    upper_red2 = np.array([180, 255, 255])
    mask1 = cv2.inRange(frame, lower_red1, upper_red1)
    mask2 = cv2.inRange(frame, lower_red2, upper_red2)
    mask3 = cv2.bitwise_or(mask1, mask2)
    red_pixels = cv2.countNonZero(mask3)
    total_pixels = frame.shape[0] * frame.shape[1]

    # Calculate proportion
    red_proportion = red_pixels / total_pixels


    return red_proportion >= red_threshold
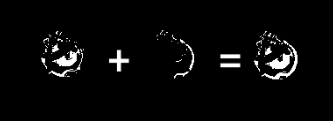
Let’s use this image of a health potion to understand how color isolation works.
An interesting piece of color theory that I learned as a result of this project is that red exists at both ends of the Hue scale, thus we need to capture two ranges that cover the 180/0 degree boundary.
upper_red2 = np.array([180, 255, 255])
upper_red1 = np.array([10, 255, 255])
lower_red1 = np.array([0, 100, 100])
lower_red2 = np.array([160, 100, 100])

mask1 = cv2.inRange(frame, lower_red1, upper_red1)
mask2 = cv2.inRange(frame, lower_red2, upper_red2)

mask3 = cv2.bitwise_or(mask1, mask2)
We need to create two separate bit masks using the inRange method provided by opencv. This will provide us with all the pixels within a provided range.
Note: mask1 + mask2 = mask3
Using the bitwise_or method, we are able to combine the two masks previously generated and the resulting red pixel count is divided by the total pixel count to determine if the red proportion exceeds the defined threshold.
Hey, pretty cool. We can now combine our logic for checking the color threshold with our screen capture data.
with mss() as sct:
# Part of the screen to capture
	monitor = {"top": 1000, "left": 0, "width": 100, "height": 50}
	last_used = []
	# Screen Capturing
	while True:
		last_time = time.time()
		# Get raw pixels from the screen, save it to a Numpy array
		img = np.array(sct.grab(monitor))
		# Display the picture
		cv2.imshow("OpenCV/Numpy normal", img)

		is_red = isolate_red(img, red_threshold=0.5)

		if is_red == True and rate_limit(last_used, last_time):
			if len(last_used) == 0:

			last_used.append(last_time)
			    # I'm sure you get the point
			playsound("metal-pipe-clang.mp3")
		else:
		last_used.pop()
	# Press "q" to quit
	if cv2.waitKey(25) & 0xFF == ord("q"):
	cv2.destroyAllWindows()
	break
Here we’re simply taking each frame passing passing it to the previous helper function and if we surpass the threshold, we fire off playsound("metal-pipe-clang.mp3) to alert us of danger.
Note to self: Lower volume. This jump scared me when testing.
It’s incredible how much you can learn from such a small project! I mainly took this project on as a means to better understand the considerations of accessibility in the Video Game space specifically. It’s very obviously quite different from the considerations codefied for the web but parallels can always be drawn in in UI development. Thanks for reading!
The entire code is available here!